Category — Recipes
Thanksgiving Countdown

Can you believe it’s November already? That Halloween is behind us and that we’re staring down the barrel of THE HOLIDAYS? The older I get, the more quickly time passes . . . not a great combo, if you think about it. But that’s for another post.
The next major food-oriented holiday is Thanksgiving – are you hosting? I *love* hosting Thanksgiving dinner, and have been doing it for our family for the past few years, but this year I asked for a pass since I’ve had all these foot issues . . . so my dear sister-in-law agreed to take on the job.
Over the next several days, I’ll share some of my favorite Turkey-day recipes with you – the ones I make, year after year. Even if you’re not hosting, chances are you’ve offered to “bring something” to contribute to the meal – come here for ideas, and let me know if you need a specific recipe. [Read more →]
November 3, 2009 5 Comments
Pumpkin Chocolate Chip Squares
I know I said that my favorite Halloween treats are pre-fab bits of artificial everything, but I have some favorite fall desserts that are more wholesome. And since I’ve been sharing lots of savory meal ideas, I thought I’d mix it up and share with you a super-easy fall dessert – loved by kids and grownups alike.
If you want to give this more nutritional value, you can substitute whole wheat pastry flour for all or half of the all-purpose flour called for in the recipe. The WW pastry flour has a higher starch and lower gluten content than regular WW flour, so it offers less structure for your product, but will give you a more tender result. Because it’s pastry flour, it’s finer and its somewhat nuttier taste is much less noticeable than regular whole wheat flour (read: less grit). I have made these with all WW pastry flour, and people have raved about them . . . shhhhh, they didn’t realize they were enjoying some added protein and fiber!
Pumpkin Chocolate Chip Squares
2 c. All-purpose flour 1 T. plus 1 t. Pumpkin pie spice 1 t. Baking soda 3/4 t. Salt 1 c. (2 sticks) Unsalted butter, softened 1 1/4 c. Sugar 1 Large egg 2 t. Vanilla 1 can Pumpkin puree (NOT pie filling – there should be no sugar added) 1 package (12 oz.) Semi-sweet chocolate chips
Preheat the oven to 350. Spray a 9×13-inch pan with cooking spray. In a medium bowl, whisk together the flour, pumpkin pie spice, baking soda and salt and set aside. With an electric mixer, cream together the butter and sugar until smooth and fluffy; beat in the egg and vanilla until combined. Beat in the pumpkin puree. Reduce speed to low and mix in the dry ingredients until just combined. Fold in the chocolate chips.
Spread the batter evenly in the prepared pan. Bake until the edges begin to pull away from the sides of the pan and a toothpick inserted in the center comes out with just a few moist crumbs attached, about 35-40 minutes. Cool completely in the pan, cut into squares, and serve!
Adapted from Martha Stewart Living Magazine
October 30, 2009 6 Comments
Tasting Fall: Chicken With Apples And Onions
Today’s recipe is a little more time-consuming than the usual 30-minute jobbies, but it still clocks in at a reasonable time for a weeknight dinner – 40 minutes. Warm apple slices and onions compliment tangy, mustardy chicken cutlets to serve up a healthful, yet flavorful main dish.
Chicken With Apples And Onions
2 tsp. Extra-virgin olive oil 1 Onion, halved, then sliced into 1/4-inch slices 1/2 c. Apple cider 1 Granny Smith apple, cored, peeled, and cut into 1/4-inch slices 4 (1/4-lb.) Chicken cutlets 1/2 t. Kosher salt 1/2 t. Freshly ground black pepper 1/2 t. Ground coriander 4 T. Dijon mustard
Sprinkle the chicken with salt, pepper and coriander. Brush each side of the cutlets with the mustard. Set aside.
Heat the oil in a medium skillet over medium heat. Add the onion and cook, stirring frequently, until softened and lightly browned, about 10 minutes. Add the cider; reduce the heat and simmer for 3 minutes. Add the apple slices and cook, stirring occasionally, until they are tender, about 5 minutes.
Spray another skillet (preferably cast iron – you’ll get a nice crust) with cooking spray and heat it over medium-high heat. Add the chicken and cook until cooked through, about 5 minutes per side. Serve the chicken topped with the apple mixture.
Serves 4.
Adapted from Weight Watchers Magazine.
October 29, 2009 1 Comment
Vietnamese Chicken With Bok Choy
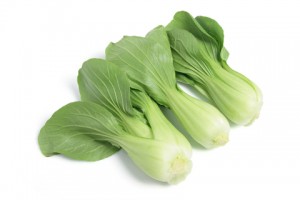
This quick little recipe features bok choy, a Asian green sold in either mature or baby form. It belongs to the plant family cruciferae, the other members of which are, as you know, some of my faves: broccoli, cabbage, cauliflower and Brussels sprouts. Bok choy’s a good source of lots of important vitamins, and is actually a great source of calcium.
Mature bok choy has white stems and dark green leaves; baby bok choy is light green in color. It’s relatively cheap to buy, and can be stored unwashed in a plastic bag in your fridge for up to 3 days. To prepare bok choy, rinse it off and chop the leaves and the stalks – you may want to keep them separate depending on how you’re using your bok choy because the stalks take longer to cook than the leaves. Baby bok choy is good cooked whole.
This is another 30 minute recipe, originally written to serve 4, but D. and I agreed it’s better suited for 2 people.
Vietnamese Chicken With Bok Choy
Juice of 1 lime 1 T. Asian fish sauce 1 T. Low-sodium soy sauce 1 T. Sugar Pinch of crushed red pepper 4 Baby bok choy, halved lengthwise 1/2 t. Kosher salt 2 t. Canola oil 1 Shallot, finely chopped 1 Clove of garlic, minced 2 c. Shredded carrots 1/2 lb. Ground skinless chicken breast 1/2 t. Freshly ground black pepper 2 Scallions, thinly sliced
Mix the lime juice, fish sauce, soy sauce, sugar and red pepper in a small bowl. Put the bok choy cut side down in a large skillet. Add enough water to reach halfway up the sides of the pan; cover and bring to a boil. Turn the bok choy over, reduce the heat, and simmer uncovered until crisp-tender, about 1 minute. Drain; transfer the bok choy to a platter and tent with foil to keep warm.
Meanwhile, heat the oil in a large skillet over medium-high heat. Add the shallot and the garlic and cook, stirring frequently, until the shallot is soft. Add the carrots and cook until they’re softened. Add the chicken, the salt, and the pepper; cook, breaking up the chicken with a spoon, until the chicken is no longer pink. Stir in the scallions.
Divide the bok choy between two dinner plates. Spoon the chicken mixture over the bok choy and drizzle the lime juice mixture over the top. Serves 2.
Adapted from Weight Watchers Magazine.
October 27, 2009 3 Comments
Microwave Popcorn In A Paper Bag
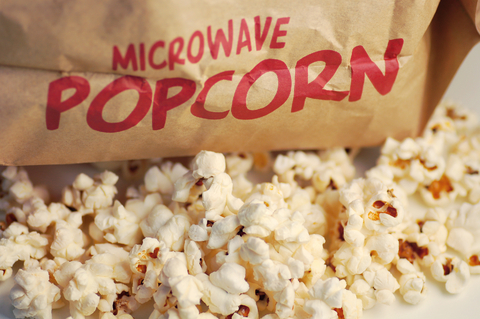
Happy Friday, friends! Today I’m blogging about a food I have a love/hate relationship with: commercially-prepared microwave popcorn. On the love side: it’s convenient, and it’s a great, crunchy and low-calorie snack (if you get the light version, as I do). On the hate side: it’s spendy and loaded with nasty chemicals and artificial ingredients. I’ll be honest – microwave popcorn has been a bugaboo for me for a while. Even though I eschewed artificial stuff in other areas of my life, I was still eating the stuff, especially when strictly watching what I eat (as I am now).
Well, I’ve decided to get on the wagon and get this junk out of my life. I no longer own an air popper – had one in college and have no idea where it went. I do own a Whirly Pop, which is essentially what my grandparents and parents used to pop corn – but that involves oil (and usually copious amounts of butter and salt), and while delicious, it’s not the low-cal snack option I’m looking for often.
A few days ago, I tried popping popcorn in a paper lunch bag, and let me tell you, it’s marvelous! I have no idea why it took me so long to get here. Here’s what I do. Put 2 tablespoons of kernels in the bag (I get organic popcorn at Whole Foods, but any type will do), fold the top of the bag down twice and secure it with Scotch tape (this is the microwave, so don’t get any bright ideas about using paper-clips, people!). Stand it in the microwave, and set your micro to go for 5 minutes. DO NOT let yourself become distracted by children, small animals, or heaps of dishes overflowing from your sink . . . you need to listen to your corn because microwaving times may vary. It’ll pop hard for a couple of minutes, and once it slows way down, take it out. Carefully open the bag (hot steam), and you will see a few cups of nice, fluffy corn waiting for you. Consume as-is, or doctor it up with seasonings of your choice . . . . and if you want to indulge a bit, try this recipe for microwave caramel corn.
I’m eating the plain version of this a lot now, and I’m finding that since I’m not eating much junk, I’m tasting and enjoying the nice nutty taste of the corn more than I thought I would. I love the crunch, and the volume. I’m excited because the winter CSA we signed up for says it’ll have popcorn as part of the share – it’ll be fun to try out different varieties. So while this is not your satisfyingly buttery/salty indulgence, it is a way to get a low-calorie (about 100 calories for those 2 T. of kernels), high fiber, all-natural snack.
Have a great weekend!
October 23, 2009 8 Comments
Poached Cod With Harissa
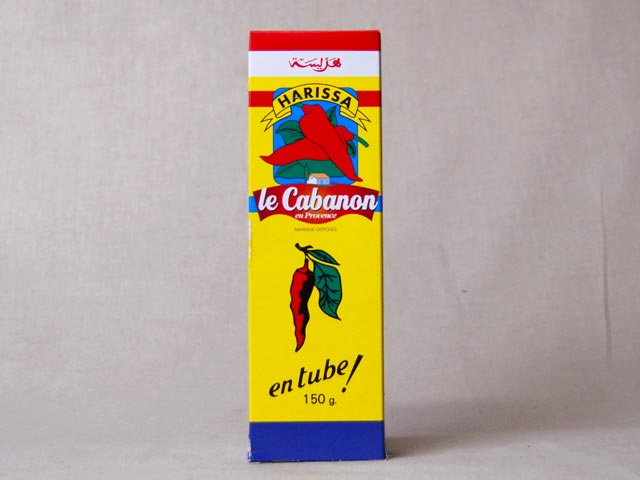
Instead of an underutilized veggie, today I’m highlighting what I think is an underutilized (at least around here) seasoning: harissa. Harissa is a spicy, brick-red chili paste originally from the Berber people of Tunisia but which is used all over the world. How you use harissa is a personal thing – in Tunisia, harissa is served at virtually every meal as part of an appetizer. It’s also used as an ingredient in a meat (usually goat or lamb) or fish stew with vegetables, and as a flavoring for couscous. In the West it’s eaten with pasta, in sandwiches and on pizza or else as a breakfast spread for tartines and rolls. The paste’s taste can vary from one region to another, for example, in Saharan regions, harissa can have a smoky flavor.
You can find harissa in tubes, cans or bottles at many North African and Middle Eastern markets (I get mine at Sevan Bakery in Watertown, but I’m pretty sure they even carry it at Whole Foods now).
Today’s recipe is a good introduction to harissa if you’ve never used it before. The harissa adds some nice spice and a deeper flavor to the otherwise plain tomato sauce used here. Lots of cilantro rounds it all out. This is also a good dish for people who aren’t crazy about plain ol’ baked or poached fish . . . you get all the benefits of eating fish without any fishy taste, whatsoever. Serve this with fresh Syrian bread to mop up the good sauce. This dish will take you under 20 minutes to prepare, counter to table. Enjoy!
Poached Cod In Spicy Tomato Sauce (adapted from The Half Hour Cook by Jenni Fleetwood)
2 1/2 c. Tomato sauce 1 t. Harissa (or more to taste – start with a little and add more – I usually use a tablespoon but that’s pretty hot) 1/2 c. Chopped fresh cilantro 1 lb. Cod fillets, cut into chunks Kosher salt & freshly ground black pepper to taste
Heat the tomato sauce with the harissa and cilantro in a large saucepan or medium-sized Dutch oven. Add salt and pepper to taste and bring to a boil. Remove the pan from heat.
Add the fish to the hot sauce and return to the heat. Bring the sauce to a boil again, the reduce the heat and simmer gently for about 5 minutes, or until the fish flakes easily. Taste the sauce and adjust the seasonings, adding more harissa if necessary. Serve hot or warm. Serves 4.
Adapted from The Half Hour Cook by Jenni Fleetwood.
October 22, 2009 2 Comments
Ginger Spiced Chicken & Rice
Happy Tuesday, friends! I hope your week is off to a good start. Today’s recipe highlights the flavors of North Africa – and because it involves a marinade, it’s got great depth of flavor. But best ever, once you’re ready to cook, it’s 30 minutes from counter to table. Hooray!
Ginger Spiced Chicken And Rice
1 1/4-1 1/2 lbs. Chicken cutlets 4 Green onions, finely chopped 1/2 c. Freshly-squeezed orange juice (approximately 1 orange) 1 T. Brown sugar 1 T. Bottled minced ginger 1 T. Extra-virgin olive oil 1/2 t. Bottled crushed garlic 1 t. Ground corriander 1/2 t. Paprika 1/2 t. Kosher salt 1/4 t. Ground cinnamon 1/4 t. Freshly ground black pepper 2 c. Hot cooked brown rice (I use Whole Foods frozen brown rice often, because all you need to do is heat it up – super quick)
Put the chicken in a gallon sized zip-top bag. For the marinade, combine green onions, orange juice, brown sugar, ginger, oil, garlic, corriander, paprika, salt, cinnamon and pepper in a small bowl. Pour over the chicken, seal the bag, and mix the contents all around so the marinade covers the chicken. Marinate in the fridge for at least 2 hours, or up to 6 hours, turning the bag occasionally.
Drain the chicken, reserving the marinade. Lightly coat a baking dish with cooking spray. Arrange the chicken in the dish and pour the remaining marinade over the chicken.
Bake, uncovered, in a 375 oven for about 10-15 minutes, or until the chicken is no longer pink. Spoon the rice onto 4 dinner plates, and place the chicken atop the rice. Spoon the remaining pan juices over the chicken and rice. Serves 4.
Add some steamed green beans on the side, or try these:
Ginger and Honey-Glazed Carrots
3 c. Water 1 t. Kosher salt 1 1/2 lbs. Baby carrots 1 T. Unsalted butter 1 T. Honey 2 t. Bottled minced ginger
Line a baking sheet with paper towels. In a large skillet, combine water and salt. Bring to a boil and add carrots. Return to boiling and then reduce heat, cover and simmer about 12 minutes or until carrots are just tender. Drain carrots. Turn the carrots out on to the baking sheet and pat them dry.
To make the glaze – in the same skillet combine butter, honey and ginger. Stir constantly over medium heat until the butter is melted.
Add the carrots to the glaze and toss gently until the carrots are throrughly coated with the glaze and are heated through. To serve, divide carrots among the dinner plates and drizzle with the remaining glaze from the pan. Serves 4-6.
Both recipes adapted from the Better Homes & Gardens New Dieter’s Cookbook.
October 20, 2009 1 Comment
More Good-For-You Greens: Kale
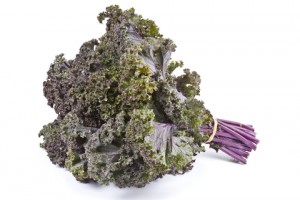
This short but pointed post about the nutritional benefits of kale on Andy Bellatti’s blog “Small Bites” was perfectly timed – that night we were scheduled to eat one of my all-time favorite quick-n-easy kale recipes – chicken sausage with bulgur and kale. This recipe is a pain-free way to introduce this nutrient powerhouse into your diet: It’s a pretty, nutritious, one-dish meal you can serve your family in 30 minutes or fewer – what’s not to love??
Sausage With Bulgur and Kale
1 (12 oz.) Package fully cooked chicken sausage with roasted red pepper (I use Hans’ from Whole Foods), each sausage halved lengthwise, then sliced into 1-inch thick slices 1 Bunch kale – any type (purple looks pretty) – coarsely chopped 1 t. Bottled crushed garlic (or 3-4 cloves of minced garlic) 14.5 oz. Low-sodium chicken broth (one can, or if you’re trying to avoid BPA, use broth packed in aseptic packs) 1 c. Bulgur 1/2 t. Kosher salt 1/2 t. Freshly ground black pepper 1 Pint grape tomatoes, halved 2 T. Grated Romano cheese
Spray a large skillet with cooking spray and set over high heat. Add the sausage and brown, stirring frequently. Transfer to a plate. Reduce the heat and add the kale and garlic to the skillet and cook, tossing frequently, until the kale is wilted (see note below). Stir in the broth, bulgur and sausage – your liquid will not cover the mixture entirely – don’t panic! Cover and bring just to a boil, then reduce the heat and simmer for 5 minutes. Remove the skillet from the heat and let the mixture stand, covered, until the liquid is absorbed and the bulgur is tender, about 5 minutes more. Fluff the mixture with a fork, stir in the tomatoes and cheese, and serve! Serves 4.
A couple of notes. If you haven’t cooked kale or any other sturdy leavy green before, you need to know it’s bulky. You will probably have to add 1/2 the kale to the skillet and toss it around (tongs are a great tool for this) until it wilts a bit, then add more, wilt, etc., ’til you can get it all in the pan. It’s always stunning to see how much it reduces in volume.
Next – this is the second recipe I’ve posted with bulgur as an ingredient, and I’m thinking now that many of you might not be familiar with this nutritious and versatile grain. I grew up eating bulgur. Mostly, I think, because I’m part Lebanese. But as you can see, bulgur doesn’t need to be limited to Middle-Eastern cooking. It’s got much more bang-for-the-buck nutritionally than rice or couscous, and it’s just as easy to prepare. For more about bulgur, click here, here and also here.
October 19, 2009 3 Comments


