Category — Vegetarian
Lentils With Butternut Squash & Walnuts

More cooking inspired by my CSA loot – last night I used local butternut squash and cilantro, and man, this recipe is terrific! Sorta sweet from the squash, sorta zingy and a little spicy from the curry powder, nice toasty crunch thanks to the walnuts and nice, brite topnotes provided by the lime juice and cilantro. A party in your mouth . . . and your belly, because every darn thing in here is great for your body. This took about 40 minutes to prepare – that’s an outside estimate, which includes running into the living room twice to assist in the selection of an appropriate television show for L. Your cooking time may vary . . . .
Lentils With Butternut Squash & Walnuts
1 small butternut squash (or 1/2 of a squash – you need about 1 pound) 1 large shallot, minced 2 T. extra-virgin olive oil 1 1/2 t. curry powder 1/2 c. walnuts 1 1/2 c. low-sodium chicken broth 1/3 c. lentils (I used Pardina lentils, but brown are a good substitute) 2 T. chopped fresh cilantro sprigs Juice of 1/2 lime
Preheat the oven to 425 degrees. Halve, peel and seed squash and cut it into 1/2-inch pieces. In a 9×13-inch baking dish, toss the shallot with the squash, oil, curry powder, and salt and pepper to taste until combined well. Bake squash mixture in middle of oven until almost tender, about 20 minutes.
While the squash is baking, boil the chicken broth in a small saucepan, add the lentils, and cook until the lentils are just tender but not falling apart, about 20 minutes. Drain lentils in a sieve and transfer to a bowl.
Chop the walnuts and place them in a small, dry frying pan. Toast the walnuts over low-medium heat, stirring constantly.
To the lentils add the squash mixture, cilantro, lime juice, toasted walnuts and salt and pepper to taste and toss until combined well.
The original recipe says that this serves 2 as a side dish, but that’s a big portion of what I’d consider a very hearty side dish! I ate 1/2 of this recipe as my main course and was quite full . . . you could even serve this with brown rice or quinoa to stretch it out a bit if you like.
A note on toasting nuts: did you know that if you toast your nuts before adding them to recipes it’ll boost their flavor? All you need is a few extra minutes and a dry skillet. Toast the nuts over low heat, and stir them constantly. Watch them closely because they’ll toast all-of-a-sudden and can burn just as quickly!
November 12, 2009 4 Comments
Baked Apple Sauce and Braised Red Radishes

I’m straying from my promised Thanksgiving prep theme here – let me know if you want me to veer back . . . I’m just having so much fun with all these vegetables. When I started my gig as a stay-at-home mom (which as many of you know, I NEVER in a million years thought I would do), I found (still do) great pleasure and intellectual stimulation in seeking out new ways to cook different foods. This share’s brought back that old feelin’ again – yesterday’s challenge was what do I do with 10 lbs. of apples and I don’t love radishes, what to do?
L. loves applesauce. She also loves to cook – so the logical solution to the too many apples problem was applesauce (better for mama not to have a pie, or apple goodie around the house anyway). This easy recipe was our afternoon activity yesterday – peeling apples is a kid-friendly task, as is MASHING. Kids love to mash. Who can blame ‘em? (BTW, still have 8 apples left . . . hmmmmm).
Baked Apple Sauce
10 large apples, cored peeled and sliced 3/4 c. sugar 1 1/4 t. ground cinnamon 1 1/4 t. vanilla extract
Set aside 2 9×13-inch baking dishes. Place the apples in the dishes, dividing evenly between the two dishes. In a small bowl combine the sugar, cinnamon and vanilla; mix well. Sprinkle over apples. Cover each dish with foil and bake at 350 degrees for 40-45 minutes or until apples are tender. Uncover and mash with a fork or a potato masher. This stuff is SO delicious. Depending on your tastes and what sort of apples you use, you can play with the amount of sugar. This is sweet as is, but not sickeningly so. It’d be great on oatmeal, atop some fat-free Greek yogurt, mixed into wholegrain pancake batter (or on top of pancakes), as an accompaniment to latkes, etc. etc.
Next task was radish rescue. I’ve never been a fan of radishes – I mean, they’re OK, but I’d never buy some to nosh – only to make a salad look pretty or to use as garnish. I had a beautiful bunch of bright red radishes from the CSA share . . . so I consulted Deborah’s Madison’s Vegetarian Cooking For Everyone and made up this little ditty. Cooked radishes are much mellower than their raw cousins - I like them a lot better. The thyme in this went nicely with my leftover lentil soup.
Braised Red Radishes
1 bunch red radishes (approximately 10) 1 T. extra-virgin olive oil 1 shallot, minced Several pinches of dried thyme Kosher salt & freshly ground black pepper to taste Low-sodium chicken brothTrim the leaves from the radishes and scrub them clean. Leave small radishes whole and halve or quarter the larger ones – you are aiming for uniform size (and therefore cooking time) here. Heat the olive oil in a saute pan and add the shallot and the thyme and cook for 1 minute on medium heat. Add the radishes, a bit of salt and pepper and enough chicken broth to cover the radishes about halfway. Cover and simmer, stirring every 5 minutes or so, until the radishes are tender, about 20 minutes. Remove the radishes to a serving dish. Boil the remaining liquid (there won’t be much left) until only a little bit remains – it’ll be a lovely pinkish color and will be loaded with shallot and studded with the thyme. Pour this over the radishes, taste for salt and pepper and add more if you wish, and serve. Serves 2.
November 11, 2009 No Comments
CSA Love and Easy Garlicky Lentil Soup

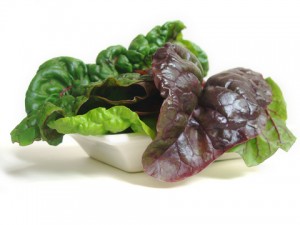
Aw yeah, I love love love all this fresh produce! Sunday night we had an improptu pizza dinner at home, so I whipped up a quick tossed salad with what I had on hand – some of the delicious lettuce I got in my share on Saturday. I added some diced super sweet red peppers that were also included . . . and it was delicious. Even D. (a.k.a. “King Carnivore”) was raving about the tasty veggies.
So some of you have been wondering “what the heck is a CSA?” CSA stands for Community Supported Agriculture, and here’s how it works. The CSA I bought into is called the Shared Harvest CSA (formerly the Belmont CSA), which offers items from a few different farms in each share. So far, so great! I have one more distribution, next month, but I’m completely sold on them and will re-up for the spring/summer months if they go forward with that. I don’t have the space or growing conditions (too shady) to have a vegetable garden in the backyard, so this is the next best thing. Sure, I lack some control over what I get, but you know what? It’s an adventure, and I know I’ll be trying things I never have before (rutabaga, anyone?). Bring it on!
One of my goals for this fall and winter is to make more soup – it just hasn’t been something I’ve cooked often. Dunno why. Last night I made this Garlicky Lentil Soup using some of the garlic and onions I received in my share. It’s pretty quick to prepare – about 10 minutes to chop up the onions and garlic and throw it all in the pot, then approximately 25-30 minutes to cook. So you could come home from work, throw it together, then get lunches packed, answer emails, throw in laundry, etc. while it simmers. If you want to make it vegan, use vegetable broth instead of chicken. In either case, your house will smell yummy from all the garlic and thyme.
I served this up with a fresh green salad (I had more of my lettuce and peppers). It’d be super-delish with some crusty bread or toasty open-faced grilled cheese sandwiches on the side . . . .
Garlicky Lentil Soup
8 large cloves garlic, roughly chopped 1 medium onion, roughly chopped 1 T. extra-virgin olive oil 1 t. dried thyme leaves 2/3 c. Pardina lentils (these are Spanish lentils, and if you can’t find them, brown lentils are a good substitute – you want a lentil that’ll hold its shape) 4 c. low-sodium chicken broth 4 T. chopped fresh flat-leaf parsley leaves Kosher salt and freshly-ground black pepper to taste Extra-virgin olive oil to taste Red wine vinegar to taste
In a medium-sized saucepan, saute the onions and garlic in the 1 T. of olive oil until the onions are translucent. Add the lentils and the thyme, then pour in the chicken broth. Bring to a boil, then cover and simmer for 25 minutes, or until the lentils are tender. Stir in the parsley, salt and pepper to taste. Serve the soup drizzled with a little olive oil and red wine vinegar – the oil adds richness and the vinegar adds brightness. This recipe serves 2, but could easily be doubled. I ate one portion of this, and I imagine the leftovers will be spectacular today because the flavors will’ve had a chance to meld.
November 10, 2009 7 Comments
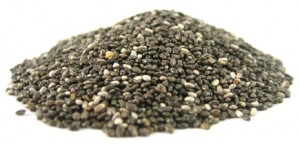
I’m Experimenting: Ch-Ch-Ch-Chia Seeds

We’re going to start the week on a healthy note. Let’s take a little break from Thanksgiving prep to talk about a new adition to my diet, chia seeds. Have you heard of chia? You might remember Chia Pets, the cute little terracotta figurines you smear with seeds to help them grow “fur.” These are the same seeds, but don’t pilfer your pet’s stash – those seeds aren’t consumption grade. The ancient seeds are actually packed with rich nutrients. Chia seeds are a genus of the mint family, originating in Mexico’s central valley and were widely cultivated by Aztec cultures in pre-Hispanic times. Chia seeds were often used as currency for tax payments to nobility and as offerings for the Priesthood. They’re so nutritious that one tablespoon of seeds was believed to sustain an individual for 24 hours!
Chia is gluten-free, with very high concentrations of omega-3 fatty acids (ALA), significant levels of antioxidants, dietary fiber, oil, protein, calcium, phosphorous, and potassium. Two tablespoons of my Navitas Naturals chia powder have 70 calories, 4.5 grams of fat, 6 grams of fiber and 3 grams of protein.
So, why would a person choose chia over flax, another vegetarian source of omega-3′s? Chia actually has a slightly higher concentration of omega-3 fatty acids than flax. Another advantage of chia over flax is that chia is so rich in antioxidants that the seeds don’t deteriorate, so they can be stored for long periods without becoming rancid. And, unlike flax, chia doesn’t have to be ground to make its nutrients available to the body.
Another big reason to choose chia over flax is phytoestrogens. Are your eyes glazing over? Stick with me here! Those of you who’re living with breast cancer probably are already aware of phytoestrogens – they’re plant-based estrogens that may or may not mimic the natural estrogens in our body and therefore raise our estrogen levels. You can also find ‘em in soy, which is why a lot of women who’ve had breast cancer avoid or limit their soy consumption. Whether or not phytoestrogens raise your natural estrogen levels is still controversial, and I’ve heard differing opinions from reputable sources. So what’s the best alternative? Chia seed. Chia contains no phytoestrogens. And since it’s just as good, if not better source of ALA, why not use chia instead?
Another note – you can’t compare the omega-3 fatty acids in chia (or flax, for that matter) to the omega 3’s you get from salmon. It’s like comparing apples to oranges. The type of omega 3 in chia (and flax) is alpha-Linolenic acid, or ALA, which is different from the omega 3’s in fish – DHA and EPA – needed for optimal health. ALA must be converted in the body to DHA and EPA – so you need to eat seven times the amount of ALA to get 1 gram of DHA. That’s a helluva lot of chia. The bottom line here is that chia is a nutritious whole food and a good addition to a healthy diet. For a great all-around, but easy to understand primer on omega 3′s, take a look at this great post from Foodicate.
Whaddaya do with chia, anyway? Chia has a nutty, but unobtrusive flavor. You can mix the whole seeds in water and add lime or lemon juice and sugar to make a drink known in Mexico and Central America as “chia fresca.” As with ground flax, you can sprinkle ground or whole chia seeds on cereal, in yogurt or salads, or grind them and mix them with flour for making muffins or other baked goods. I’ve only tried them in smoothies, so far, and I will admit that I don’t foresee making baked goods with chia . . . I think that all the butter and sugar I use would negate any health benefit of the chia, frankly!
How ‘bout you? Have you tried chia? How do you incorporate these super-seeds into your diet?
November 9, 2009 No Comments
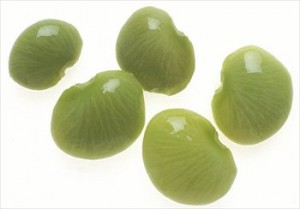
Say Yes to Lima Beans!

I suspect that lima beans aren’t on your top 10 favorite veggies list, but who knows? You might surprise me. I have a great recipe for you today that that just might convince the haters out there . . . trust me, OK? This is easy, very tasty, and very quick – 15 minutes max from counter to table. How’s that for incentive to try?
Lima Bean & Feta Salad
1 lb. Bag of frozen baby lima beans 3-4 T. Extra-virgin olive oil 4 Small(ish) plum tomatoes, halved or quartered depending on size 2 t. Bottled crushed garlic 4 oz. Feta cheese, cut into small chunks 3 T. chopped fresh dill 15 Kalamata olives, halved Kosher salt & freshly ground black pepper to taste
Cook the limas according to package directions until just tender – do not overcook them! Drain them and set them aside.
Meanwhile, heat the oil in a heavy frying pan and add the tomatoes and garlic. Cook over medium-high heat until the tomatoes are beginning to color. Add the feta to the pan and toss the ingredients together for about 1 minute. Tip into a large bowl and mix with the beans, dill and olives. Add salt and pepper to taste. Serve warm or at room temperature.
This serves 4-6 as a side dish, but it’s a great light lunch or dinner if you serve it with some nice fresh Syrian bread. How do you tell it’s fresh bread? Do like all the little old ladies do and squeeze it . . . if it feels soft and slightly springy, it’s the good stuff. Don’t be shy!
October 15, 2009 4 Comments
Gettin’ Greens

Ladies and gentlemen, it’s official, I’m on a greens bender. I’ve had a rough couple of weeks over here and for me, when the going gets tough, I like to treat my body better than ever. Yes, I’ll admit, there are times when nothin’ says lovin’ like a brownie (or a bag o’ Cheetos, or a candy bar, or a handful of jelly beans – you are reading a woman who ate Wonder Bread slathered with Hellman’s mayo as a kid, OK?), but those things make me feel cruddy if I eat too many of them. And like I said, I’m feeling funky already. Greens and and other healthful whole foods make my body feel like it’s humming a happy tune. I kid you not.
Monday night, I did up some spinach in an unconventional, delicious, yet super quick, virtually no-chopping-required way. Thought you might want to know!
Spinach With Raisins and Pine Nuts
9 oz. Bag of pre-washed spinach (not baby spinach, it’s too delicate) 4 T. Organic raisins 2 T. Extra-virgin olive oil 3 Scallions, finely chopped 3 T. Pine nuts, toasted Kosher salt and freshly-ground black pepper to taste
Put the raisins in a small bowl and cover them with boiling water. Leave to stand for about 10 minutes until they’re plumped up, then drain.
Heat the oil in a frying pan over medium-low heat, then lower the heat further and add the scallions. Saute for about 5 minutes, or until soft, then add the spinach (you’ll have to add some, stir it up a bit to wilt, then add the rest). Once your spinach is wilting, toss in the raisins. Finish cooking your spinach (the whole process will take under 5 minutes – you don’t want to over-cook your spinach or it’ll be slimy), and then add the pine nuts and salt and pepper to taste. Makes 4 small side-dish servings, can easily be doubled and played with according to your tastes.
Adapted from The Half Hour Cook by Jenni Fleetwood.
October 7, 2009 2 Comments
In Season: Cabbage

Cabbage is in season! Cabbage is sturdy, abundant, inexpensive, plus it’s tasty, and a nutritional powerhouse. Do you like cabbage? Have you ever eaten cabbage in anything but cole slaw? If you’re ambivalent about it, I urge you to give cabbage another shot.
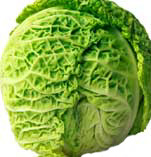
There are three main types of cabbage: green, red and Savoy. Both green and red cabbage have smooth-textured leaves. Savoy cabbage leaves are more ruffled and yellowish-green (that’s it in the photo above). Red and green cabbage have a more defined taste and a crunchy texture, whereas Savoy’s is more delicate. Savoy is my favorite.
What should you look for in a cabbage? Choose cabbage that’s firm and dense with shiny, crisp, colorful leaves without cracks, bruises and blemishes. There should be only a few outer loose leaves attached to the stem. You should also know that pre-cut cabbage, either halved or shredded, loses its valuable vitamin C content.
When you get home, keep your cabbage cold: this helps keep it fresh and retain its nutrients. Put the whole head in a plastic bag in the crisper of your fridge. Red and green cabbage will keep this way for about 2 weeks, Savoy will keep for about 1 week.
Here are three of my favorite ways to prepare cabbage – two involve curry powder, but each has a completely different taste. Each of these recipes was originally intended as a side dish, but I eat each of them as a main course often. Give them a try, and feel free to post your own in the comments.
Curried Cabbage
1 T Extra-virgin olive oil 1 1/2 t. Curry powder 1 Medium onion, thinly sliced 4 c. Shredded cabbage (about 3/4 pound) Juice of 1 lime 2 T. Non-fat plain Greek yogurt Kosher salt to taste
Heat the oil in a large skillet over medium heat. Add the curry powder and cook until fragrant, about 30 seconds. Stir in the onion and cook until it’s translucent, about 3-5 minutes. Add the cabbage and cook, stirring frequently, until the cabbage is wilted and soft to the bite, about 7 minutes. Remove from the heat and stir in the lime juice and yogurt. Salt to taste.
Serves 4. Chickpeas are a great addition for added protein and fiber, as are chunks of well-pressed extra-firm tofu. If adding tofu, I’d saute that in the oil/curry powder mixture ’til it’s crispy, then remove it from the pan before adding the onions, etc. You might need a touch more oil in this case because the tofu will sop up your initial oil. Adapted from Eating Well Magazine.
Curried Red Cabbage Slaw
1/2 Red Cabbage, thinly sliced1 Red Bell Pepper, thinly sliced or chopped
1/2 Red Onion, chopped
4 T. Cider vinegar
2 T. Sugar or to taste (the original recipe calls for 4 T.)
1 c. Plain non-fat Greek yogurt
1/2 t. Curry powder
2-3 Handfuls of raisins
Kosher salt and freshly ground black pepper to taste
Combine the cabbage, bell pepper and onion in bowl and toss to mix. In a small pan, combine the vinegar and sugar and heat to dissolve the sugar; pour over the vegetables and leave to cool slightly. Combine yogurt and curry powder and mix this into the cabbage mixture. Season to taste with salt and pepper. Mix in raisins. Chill. Just before serving, pour off any accumulated liquid and briefly stir the slaw again.
Serves 4. Adapted from The Half Hour Cook by Jenni Fleetwood.
Sauteed Savoy Cabbage With Walnuts
1/2 Head of Savoy cabbage, shredded 2 T. Extra-virgin olive oil 1/3 c. Walnuts, roughly chopped Small amount of low-sodium chicken broth Kosher salt and freshly ground black pepper to taste
Heat the olive oil in a medium skillet over medium heat. Add the cabbage and saute, stirring frequently, until soft to the bite. If the cabbage starts to brown and/or the pan starts to get too dry, lower the heat and add approximately 1-2 T. of chicken broth. Remove from heat, stir in walnuts and salt and pepper to taste. Serves 2 but is easily doubled. Adapted from a recipe by Ina Garten.
October 5, 2009 1 Comment
Mexican Quinoa

This is another super quick recipe. I found the inspiration for this from a thread on Chowhound, which, if you don’t use it already, is a GREAT resource for home-cooking ideas (also for area-specific dining ideas).
Mexican Quinoa
1 c. quinoa, rinsed and drained 1.5 t. cumin 1/4 t. chipotle chili powder 1/2 t. chili powder 1/2 t. paprika 1/2 t. salt 2 c. low-sodium chicken broth 1 c. prepared salsa 1 can kidney beans, rinsed and drained 4 scallions, green parts only, chopped 3 c. fresh baby spinach
Cook quinoa according to the package directions, using the broth (not water).
Meanwhile, heat the kidney beans with the salsa. Add the spices above, or tweak to taste. Add the heated salsa mixture to the cooked quinoa and stir in the green onion and spinach until the spinach is wilted.
Serves 4.
September 24, 2009 No Comments


