My Take: Halloween

So as most of you are painfully aware, Halloween is coming up on Saturday. I’m getting inundated with healthful tips from all sides – from my trainer on Facebook (who calls for an all-out boycott of the candy-fest), to e-newsletters about weight loss and maintenance (filling us in on the caloric horrors that await us at every turn), to posts on enviro-blogs (suggesting ways to “green” up the holiday). That’s not to mention the kid-generated hysteria that’s swirling around.
Another mom asked me this week what “I was going to do about Halloween,” and I realized that she probably thought that I was going to come up with some creative ideas for her about how to deal with all the candy and unhealthiness of the whole deal. I’m sure I disappointed her. I’ll tell you what I told her. This Halloween will be no different than any other: I’m going to seek to studiously avoid emptying the candy bucket while we allow L. to trick-or-treat her heart out and to eat too much candy that night, and maybe the next day, too.
No, I’m not handing out stickers, or popcorn, or organic or natural anything. Our candy is going to be artificially colored and flavored. Can you believe it?
It’s really not so odd, and there is a method to my madness. Despite the healthy recipes I put up here, and my commitment to cooking and eating whole foods and to exercising my body every day, I also preach moderation. And that means that a few times a year, we go hog-wild and eat whatever the heck we want, and we enjoy it, darn-it!
This is the tack I take with my kid, and it’s a good rule for all of us – candy and other junk foods are “sometimes” foods – they are not “grow foods,” in that they have no nutritional value. But they are tasty, and they are fun, and they are definitely OK to incorporate in small amounts into your diet. I allow her treats and the occasional odd-request to have Ritz crackers or Cheez-Its for breakfast. I haven’t put a lot of limits on food, in the hope that she would start to be able to moderate and to make her own, wise choices about what she eats. Just like we grownups should do, right? She is, after all, an adult-in-training.
So what we’re left with is a kid who sometimes has a peppermint candy before dinner . . . but NOT with a kid who obsesses about candy and junk, the way I did when I was a kid. My parents were very strict about junk food and empty calories, and woo-hoo! When I got out of that house, whoa-Nelly, there wasn’t a box of Cap’n Crunch (with Crunchberries, thankyouverymuch) left on the shelves of my local market. Even now, when I get to eating bite-sized candies or something, I have to do a lot of self-talk to quit feeling like they’re a once-in-a-lifetime indulgence (it goes like this “you know, you can go up the street and buy a candy bar any day of the week!”). Seriously – it borders on ridiculous.
All this business of cancelled bake sales and banning Halloween candy is not teaching our kids to moderate themselves and to make good choices down the road. Instead, it’s turning candy and treats into the ultimate forbidden fruit . . . and we all know how that goes down in the end. We need to educate kids as to why it’s not great to fill up on junk, about what it does to a body and a mind, and then once they’re equipped, hope that they make good choices for themselves when we’re not around to help out. Just like crossing the street.
So how ’bout you? What are you going to “do about” Halloween? Do you indulge? Abstain? What are your favorite treats? Are there some homemade goodies you’d like to tell us about? Not me – mine all come plastic-wrapped with pre-printed labels. I’m a sucker for mini Butterfinger, Snickers and Three Musketeers, I can hardly ever turn down a Reese’s Peanut Butter Cup . . . .
October 28, 2009 5 Comments
Vietnamese Chicken With Bok Choy
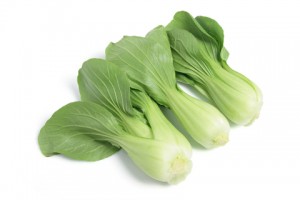
This quick little recipe features bok choy, a Asian green sold in either mature or baby form. It belongs to the plant family cruciferae, the other members of which are, as you know, some of my faves: broccoli, cabbage, cauliflower and Brussels sprouts. Bok choy’s a good source of lots of important vitamins, and is actually a great source of calcium.
Mature bok choy has white stems and dark green leaves; baby bok choy is light green in color. It’s relatively cheap to buy, and can be stored unwashed in a plastic bag in your fridge for up to 3 days. To prepare bok choy, rinse it off and chop the leaves and the stalks – you may want to keep them separate depending on how you’re using your bok choy because the stalks take longer to cook than the leaves. Baby bok choy is good cooked whole.
This is another 30 minute recipe, originally written to serve 4, but D. and I agreed it’s better suited for 2 people.
Vietnamese Chicken With Bok Choy
Juice of 1 lime 1 T. Asian fish sauce 1 T. Low-sodium soy sauce 1 T. Sugar Pinch of crushed red pepper 4 Baby bok choy, halved lengthwise 1/2 t. Kosher salt 2 t. Canola oil 1 Shallot, finely chopped 1 Clove of garlic, minced 2 c. Shredded carrots 1/2 lb. Ground skinless chicken breast 1/2 t. Freshly ground black pepper 2 Scallions, thinly sliced
Mix the lime juice, fish sauce, soy sauce, sugar and red pepper in a small bowl. Put the bok choy cut side down in a large skillet. Add enough water to reach halfway up the sides of the pan; cover and bring to a boil. Turn the bok choy over, reduce the heat, and simmer uncovered until crisp-tender, about 1 minute. Drain; transfer the bok choy to a platter and tent with foil to keep warm.
Meanwhile, heat the oil in a large skillet over medium-high heat. Add the shallot and the garlic and cook, stirring frequently, until the shallot is soft. Add the carrots and cook until they’re softened. Add the chicken, the salt, and the pepper; cook, breaking up the chicken with a spoon, until the chicken is no longer pink. Stir in the scallions.
Divide the bok choy between two dinner plates. Spoon the chicken mixture over the bok choy and drizzle the lime juice mixture over the top. Serves 2.
Adapted from Weight Watchers Magazine.
October 27, 2009 3 Comments
What I’m Loving: 10.26.09
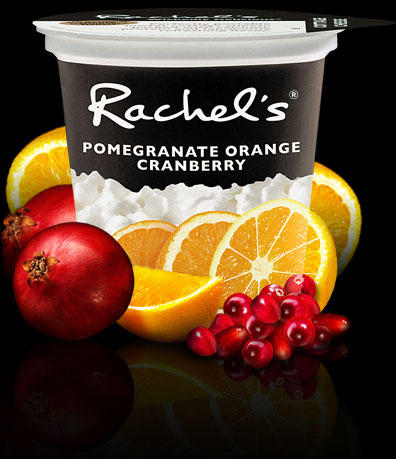
My new love is relatively new to the market – Rachel’s Cottage Cheese. Some of you may have tried Rachel’s yogurts – they come in funky, exotic flavors (Vanilla Chai, Pomegranate Acai). I have actually never tried those – I’m such a plain Greek yogurt fan, so I figured I’d save myself from getting hooked on another relatively-expensive indulgence.
But when I saw that Rachel’s was out with some interestingly flavored cottage cheese cups, and that they were each around 130 calories with around 14 grams of protein, it piqued my interest. I found them last week at the Fresh Pond Whole Foods and I am already on my second batch of them.
So far, I’ve tried the Pomegranate Orange Cranberry, the Pear Mangosteen, the Sundried Tomato Pesto and the Cucumber Dill. The only two I haven’t been able to find are the Roasted Red Pepper and the Lemon Verbena Berry. I don’t have a favorite – I love all that I’ve tried and whether I’d reach for sweet or savory depends on my mood at the moment. They’ve got a nice creamy taste, and because there’re no artificial flavors, the pomegranate and orange tastes like real fruit, the cucumber dill is very fresh and zippy with good veggie/herb flavor, etc. Almost as if you made it up yourself.
So while I remain a big fan of plain cottage cheese with my own mix-ins, this is a convenient, portion-controlled option, with mix-ins that I wouldn’t necessarily take time to do myself. I’ve been most often having one as a mid-morning or mid-afternoon snack and the protein provides a nice hold-over ’til lunch or dinner.
Here’s the link to Rachel’s Dairy if you want to get the lowdown for yourself . . . .
October 26, 2009 3 Comments
Microwave Popcorn In A Paper Bag
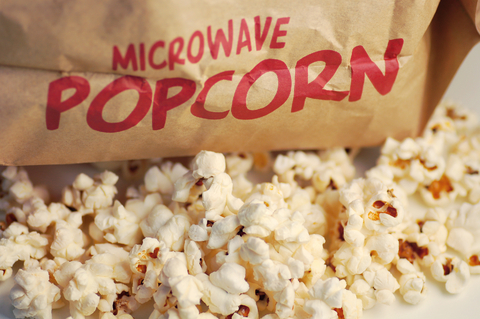
Happy Friday, friends! Today I’m blogging about a food I have a love/hate relationship with: commercially-prepared microwave popcorn. On the love side: it’s convenient, and it’s a great, crunchy and low-calorie snack (if you get the light version, as I do). On the hate side: it’s spendy and loaded with nasty chemicals and artificial ingredients. I’ll be honest – microwave popcorn has been a bugaboo for me for a while. Even though I eschewed artificial stuff in other areas of my life, I was still eating the stuff, especially when strictly watching what I eat (as I am now).
Well, I’ve decided to get on the wagon and get this junk out of my life. I no longer own an air popper – had one in college and have no idea where it went. I do own a Whirly Pop, which is essentially what my grandparents and parents used to pop corn – but that involves oil (and usually copious amounts of butter and salt), and while delicious, it’s not the low-cal snack option I’m looking for often.
A few days ago, I tried popping popcorn in a paper lunch bag, and let me tell you, it’s marvelous! I have no idea why it took me so long to get here. Here’s what I do. Put 2 tablespoons of kernels in the bag (I get organic popcorn at Whole Foods, but any type will do), fold the top of the bag down twice and secure it with Scotch tape (this is the microwave, so don’t get any bright ideas about using paper-clips, people!). Stand it in the microwave, and set your micro to go for 5 minutes. DO NOT let yourself become distracted by children, small animals, or heaps of dishes overflowing from your sink . . . you need to listen to your corn because microwaving times may vary. It’ll pop hard for a couple of minutes, and once it slows way down, take it out. Carefully open the bag (hot steam), and you will see a few cups of nice, fluffy corn waiting for you. Consume as-is, or doctor it up with seasonings of your choice . . . . and if you want to indulge a bit, try this recipe for microwave caramel corn.
I’m eating the plain version of this a lot now, and I’m finding that since I’m not eating much junk, I’m tasting and enjoying the nice nutty taste of the corn more than I thought I would. I love the crunch, and the volume. I’m excited because the winter CSA we signed up for says it’ll have popcorn as part of the share – it’ll be fun to try out different varieties. So while this is not your satisfyingly buttery/salty indulgence, it is a way to get a low-calorie (about 100 calories for those 2 T. of kernels), high fiber, all-natural snack.
Have a great weekend!
October 23, 2009 8 Comments
Poached Cod With Harissa
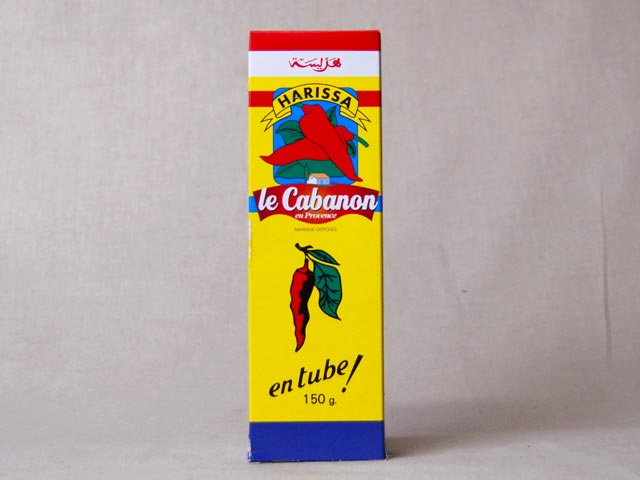
Instead of an underutilized veggie, today I’m highlighting what I think is an underutilized (at least around here) seasoning: harissa. Harissa is a spicy, brick-red chili paste originally from the Berber people of Tunisia but which is used all over the world. How you use harissa is a personal thing – in Tunisia, harissa is served at virtually every meal as part of an appetizer. It’s also used as an ingredient in a meat (usually goat or lamb) or fish stew with vegetables, and as a flavoring for couscous. In the West it’s eaten with pasta, in sandwiches and on pizza or else as a breakfast spread for tartines and rolls. The paste’s taste can vary from one region to another, for example, in Saharan regions, harissa can have a smoky flavor.
You can find harissa in tubes, cans or bottles at many North African and Middle Eastern markets (I get mine at Sevan Bakery in Watertown, but I’m pretty sure they even carry it at Whole Foods now).
Today’s recipe is a good introduction to harissa if you’ve never used it before. The harissa adds some nice spice and a deeper flavor to the otherwise plain tomato sauce used here. Lots of cilantro rounds it all out. This is also a good dish for people who aren’t crazy about plain ol’ baked or poached fish . . . you get all the benefits of eating fish without any fishy taste, whatsoever. Serve this with fresh Syrian bread to mop up the good sauce. This dish will take you under 20 minutes to prepare, counter to table. Enjoy!
Poached Cod In Spicy Tomato Sauce (adapted from The Half Hour Cook by Jenni Fleetwood)
2 1/2 c. Tomato sauce 1 t. Harissa (or more to taste – start with a little and add more – I usually use a tablespoon but that’s pretty hot) 1/2 c. Chopped fresh cilantro 1 lb. Cod fillets, cut into chunks Kosher salt & freshly ground black pepper to taste
Heat the tomato sauce with the harissa and cilantro in a large saucepan or medium-sized Dutch oven. Add salt and pepper to taste and bring to a boil. Remove the pan from heat.
Add the fish to the hot sauce and return to the heat. Bring the sauce to a boil again, the reduce the heat and simmer gently for about 5 minutes, or until the fish flakes easily. Taste the sauce and adjust the seasonings, adding more harissa if necessary. Serve hot or warm. Serves 4.
Adapted from The Half Hour Cook by Jenni Fleetwood.
October 22, 2009 2 Comments
Grab A Foam Roller For Cheap and Easy Workouts At Home

Many of you know I’ve been dealing with some pesky orthopedic issues that are keeping me from weight-bearing exercise. After 8+ months of this garbage, I’m getting a little nutso . . . watching my fitness level and body tone decline and just feeling bored and out-of-sorts about the whole deal. So lately, I’ve been getting aggressive about seeking out new ways to regain my strength and conditioning.
One Saturday, I was complaining to my Pilates instructor that my right hip was sore and bound-up (as it has been for months). She whipped out a foam roller and showed me some self-myofascial release techniques (really a fancy phrase for self-massage) that have given me more mobility and comfort in my hip and IT band than I’ve had in years. Seriously, I am not exaggerating. I bought one from her at the end of my session, brought it home, and began to explore workouts using the roller. I can’t believe that in 20 years of being an avid exerciser and PT-regular, I’ve never used one of these. I’m a convert.
You can use a foam roller in myriad ways – to stretch and massage sore spots, but also to do some challenging balance and strength moves. A foam roller costs about $25 and it’s easy to store – a perfect addition to your home-exercise studio (or living room, as is the case in our house!). Some days, I do moves on my roller while I watch t.v. at night, others I’ll bike at the gym, swing home, and do another 1/2 hour of stretching and strengthening on the roller.
I have a 36″ full round roller (they also come in 1/2 round, if you need more stability to start with). Most gyms have them, so if you want to try one out for “free,” check one out there. If you want your own, you can order a foam roller from Amazon, and read up on all the variations. Power Systems has them too, for less money, and I’ve ordered from them before with good results. Or, you can call around to sporting-goods places and/or medical supply outlets in your area to see if they carry these.
Here are just a few of the great resources I’ve found on the ‘net for foam roller workouts:
-
This guide from the About.com Sports Medicine area gives good background on what myofascial release is, how it works, and includes tips for self-release techniques for common hot spots. Includes pictures.
-
This detailed guide shows you, with photos, how to get at some of your rough spots, and then goes through some good balance and core strengthening exercises. Some of their exercises require 2 rollers for extra stabilization work.
-
This total body routine from Paige Waehner at About.com incorporates pushups, extensions, stretching and more. It also includes pictures and recommendations for beginners, intermediate and advanced exercisers.
-
This set of 6 Pilates-based moves provide a nice combination of balance, strength and stretch, and also includes pictures.
I would never say that the roller replaces the good work of a manual therapist (our PT is absolutely amazing, if you need a recommendation, email me), but it’s a great way to work out kinks on your own, in between sessions, and/or to keep up the good work you’re doing elsewhere. Give one a try!
October 21, 2009 No Comments
Ginger Spiced Chicken & Rice

Happy Tuesday, friends! I hope your week is off to a good start. Today’s recipe highlights the flavors of North Africa – and because it involves a marinade, it’s got great depth of flavor. But best ever, once you’re ready to cook, it’s 30 minutes from counter to table. Hooray!
Ginger Spiced Chicken And Rice
1 1/4-1 1/2 lbs. Chicken cutlets 4 Green onions, finely chopped 1/2 c. Freshly-squeezed orange juice (approximately 1 orange) 1 T. Brown sugar 1 T. Bottled minced ginger 1 T. Extra-virgin olive oil 1/2 t. Bottled crushed garlic 1 t. Ground corriander 1/2 t. Paprika 1/2 t. Kosher salt 1/4 t. Ground cinnamon 1/4 t. Freshly ground black pepper 2 c. Hot cooked brown rice (I use Whole Foods frozen brown rice often, because all you need to do is heat it up – super quick)
Put the chicken in a gallon sized zip-top bag. For the marinade, combine green onions, orange juice, brown sugar, ginger, oil, garlic, corriander, paprika, salt, cinnamon and pepper in a small bowl. Pour over the chicken, seal the bag, and mix the contents all around so the marinade covers the chicken. Marinate in the fridge for at least 2 hours, or up to 6 hours, turning the bag occasionally.
Drain the chicken, reserving the marinade. Lightly coat a baking dish with cooking spray. Arrange the chicken in the dish and pour the remaining marinade over the chicken.
Bake, uncovered, in a 375 oven for about 10-15 minutes, or until the chicken is no longer pink. Spoon the rice onto 4 dinner plates, and place the chicken atop the rice. Spoon the remaining pan juices over the chicken and rice. Serves 4.
Add some steamed green beans on the side, or try these:
Ginger and Honey-Glazed Carrots
3 c. Water 1 t. Kosher salt 1 1/2 lbs. Baby carrots 1 T. Unsalted butter 1 T. Honey 2 t. Bottled minced ginger
Line a baking sheet with paper towels. In a large skillet, combine water and salt. Bring to a boil and add carrots. Return to boiling and then reduce heat, cover and simmer about 12 minutes or until carrots are just tender. Drain carrots. Turn the carrots out on to the baking sheet and pat them dry.
To make the glaze – in the same skillet combine butter, honey and ginger. Stir constantly over medium heat until the butter is melted.
Add the carrots to the glaze and toss gently until the carrots are throrughly coated with the glaze and are heated through. To serve, divide carrots among the dinner plates and drizzle with the remaining glaze from the pan. Serves 4-6.
Both recipes adapted from the Better Homes & Gardens New Dieter’s Cookbook.
October 20, 2009 1 Comment
More Good-For-You Greens: Kale
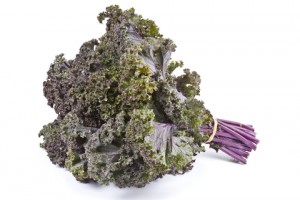
This short but pointed post about the nutritional benefits of kale on Andy Bellatti’s blog “Small Bites” was perfectly timed – that night we were scheduled to eat one of my all-time favorite quick-n-easy kale recipes – chicken sausage with bulgur and kale. This recipe is a pain-free way to introduce this nutrient powerhouse into your diet: It’s a pretty, nutritious, one-dish meal you can serve your family in 30 minutes or fewer – what’s not to love??
Sausage With Bulgur and Kale
1 (12 oz.) Package fully cooked chicken sausage with roasted red pepper (I use Hans’ from Whole Foods), each sausage halved lengthwise, then sliced into 1-inch thick slices 1 Bunch kale – any type (purple looks pretty) – coarsely chopped 1 t. Bottled crushed garlic (or 3-4 cloves of minced garlic) 14.5 oz. Low-sodium chicken broth (one can, or if you’re trying to avoid BPA, use broth packed in aseptic packs) 1 c. Bulgur 1/2 t. Kosher salt 1/2 t. Freshly ground black pepper 1 Pint grape tomatoes, halved 2 T. Grated Romano cheese
Spray a large skillet with cooking spray and set over high heat. Add the sausage and brown, stirring frequently. Transfer to a plate. Reduce the heat and add the kale and garlic to the skillet and cook, tossing frequently, until the kale is wilted (see note below). Stir in the broth, bulgur and sausage – your liquid will not cover the mixture entirely – don’t panic! Cover and bring just to a boil, then reduce the heat and simmer for 5 minutes. Remove the skillet from the heat and let the mixture stand, covered, until the liquid is absorbed and the bulgur is tender, about 5 minutes more. Fluff the mixture with a fork, stir in the tomatoes and cheese, and serve! Serves 4.
A couple of notes. If you haven’t cooked kale or any other sturdy leavy green before, you need to know it’s bulky. You will probably have to add 1/2 the kale to the skillet and toss it around (tongs are a great tool for this) until it wilts a bit, then add more, wilt, etc., ’til you can get it all in the pan. It’s always stunning to see how much it reduces in volume.
Next – this is the second recipe I’ve posted with bulgur as an ingredient, and I’m thinking now that many of you might not be familiar with this nutritious and versatile grain. I grew up eating bulgur. Mostly, I think, because I’m part Lebanese. But as you can see, bulgur doesn’t need to be limited to Middle-Eastern cooking. It’s got much more bang-for-the-buck nutritionally than rice or couscous, and it’s just as easy to prepare. For more about bulgur, click here, here and also here.
October 19, 2009 3 Comments


